“That’s why we’re happy to announce that WhatsApp will no longer charge subscription fees. For many years, we’ve asked some people to pay a fee for using WhatsApp after their first year. As we’ve grown, we’ve found that this approach hasn’t worked well. Many WhatsApp users don’t have a debit or credit card number and they worried they’d lose access to their friends and family after their first year. So over the next several weeks, we’ll remove fees from the different versions of our app and WhatsApp will no longer charge you for our service.”
This move from Whatsapp is to enhance its competition against other instant messaging apps that are free, many have already been switching to Telegram for one of these features, but there are still a question of who can see your interactions aside you on whatsapp ( privacy)
Free Download All Android Paid Launchers(Themes) .APK, much popular among Androd Devices,Free Download Android Launchers 100% Virus Free.Download Free Android Launchers New Version.
I know that not everyone even has Android Lollipop yet, so I wont just concentrate on the differences between the two most recent versions of Android. Instead Ill look at the major areas of the new OS, whether they are new, improved or missing in action. Ill break the review down into: the visual appearance of Android Marshmallow; integration of new Google products; core features of the system; security; and improvements to usability.
Update: Weve added more feedback on the fingerprint scanner and Nexus Imprint as well as further information on dark mode and Adaptable Storage Devices for microSD expansion. See the relevant sections below for more details.
Android Marshmallow was initially announced at Google I/O on May 28, when it was released as the Android M developer preview. Several updates to the preview came out before Marshmallow was officially named on August 17. Google finally unveiled Android 6.0 Marshmallow, alongside the 2015 Nexus devices, on September 29, 2015.
As usual, Googles Nexus family was first to get the goods, and the brand new Nexus 5X and Nexus 6P were the launch devices for Android 6.0. Factory images for most of the existing Nexus range – the Nexus 5, Nexus 6, Nexus 9 and Nexus Player – appeared on October 5.
To see when your device will get Android 6.0, check the following guide:
Android Marshmallow is visually similar to its predecessor, Lollipop, in many ways. Google’s Material Design language is now more pervasive than ever before and the main areas of the UI – settings, notifications shade and navigation – remain the same. But Marshmallow does have some differences in appearance and new features.
Settings shortcuts
Android has let you create shortcuts to particular settings, such as the battery or display, for a while, but until Marshmallow, the icons for these shortcuts all looked the same. Now, the standard cog widget shape contains an icon depicting what that particular shortcut goes to, as shown in the screenshot below.
The Marshmallow lock screen is almost identical to Lollipops, complete with expandable notifications and app shortcuts. But where Lollipop had shortcuts in the bottom corners that too you to the camera and dialer, Marshmallow replaces the dialer shortcut with one to Google’s voice search. This small update is the first clue as to just how integral voice commands are to Marshmallow.
Voice search has a completely new look too. Four colored dots float, become a waveform and then rotate as your voice request is picked up and then processed. The response rate varies, depending on the complexity of the search terms and your internet speed, but the results are generally accurate. You can also launch apps from the lock screen using your voice.
Home screen
The same voice command functionality appears on the home screen via Google’s dedicated search bar, complete with the colorful, post-Alphabet Google logo. The home screen itself is essentially the same as it was in Lollipop (the changes to Google’s search bar and app icons have rolled out to all devices via updates).
Google Now, assuming you have signed up for it, returns to its dedicated position to the immediate left of the default home screen. This area has also been updated but again, it is not a Marshmallow exclusive feature. Google Now on Tap (more on this later) is now launched by a long press on the home button in the navigation bar.
You have a few options for launching apps: from voice commands, app icons, the recent apps multitasking cards or the new-look app drawer. You can also jump straight into the app drawer search bar by long-pressing the app drawer icon. This shortcut will also launch your keyboard, just as it did in Lollipop.
The app drawer in Marshmallow went through a couple of changes during the developer preview process and appears in the final version as a vertical scrolling list as opposed to the paginated horizontal list from Lollipop. You can scroll through the list or use a new scrubber bar on the right to jump to a particular letter of the alphabet.
An endless vertical list means its easy to swipe right to the end of your app list – certainly moreso than swiping through multiple cards in Lollipop. Predictive apps, based on the time of day, frequency and so on, appear in a special area at the top of the app drawer and you also have the added bonus of the dedicated app search bar thats accessible via the keyboard or voice, as well as the scrubber bar.
As always, you can drag app icons from the app drawer to the home screen, but when dragging apps, you’ll now see the option to uninstall them at the top of the screen, alongside App Info or the Remove action. This only works if the app you’re dragging isn’t a system app but it’s a much more convenient way to uninstall apps.
The best thing is that these changes are part of the Google search app, so an update to that will deliver these features to all older Androids as well. The update adds the new search bar, voice interface, search bar and alphabet scrubber in the app drawer, and vertical app drawer orientation, as well as the uninstall shortcut.
As with Lollipop, Marshmallow has a two-part notifications/Quick Settings area. A single swipe down from the top of the home screen will pull down the notifications shade, where your expandable notifications live. A second swipe down on this screen, or a two-finger swipe down from the home screen, will take you to the Quick Settings panel.
The notifications area displays app notifications, which can be expanded or tapped to launch the full app. This area also shows persistent system notifications, such as when a Bluetooth device is connected or other system features are enabled. The dismiss all button now faces the other direction compared to Lollipop, but it does the same thing.
The Quick Settings area displays your screen brightness slider as well as toggles for Wi-Fi, Bluetooth, mobile data and so on. As with Lollipop, these features can either be toggled on or off with a tap, or accessed further through a Quick Settings mini-menu or the relevant area of the full settings menu.
At the top of both the notifications shade and the Quick Settings area is a kind of status bar area. In the notifications shade you’ll see the time and date, various status bar icons and the icon for switching users. Oddly, tapping this in the notification shade simply opens up the Quick Settings area where it must be tapped again to change users or enter Guest Mode.
In the Quick Settings area, this area expands a little further, displaying battery percentage, carrier information and a shortcut to the settings menu. Long pressing the settings cog icon will give you access to the System UI Tuner.
First things first. If you are not a Xiaomi Redmi 1s user, this post is not for you. I couldnt include that part to the title due to obvious reasons.
When will you need this?
If you found some issue in one rom that keeps occurring in future ROMs as well, look no further, this is for you.
If your phone is on a custom ROM and it has so many issues that need fixing
If you want to get the phone back to factory state in all aspects
Note that using this method will re install all the basic stuff such as audio drivers etc
Stuff you will need
A PC - we are gonna be doing the flashing via pc
Fastboot rom - note that the fastboot rom is not the same as the other normal ROM zip file that you use to flash via custom recovery. Fastboot ROMs are larger in size and can be found here
Minimal adb fastboot set up from here
A .tar file extractor like Peazip from here to initially extract the fastboot rom and another one like 7-zip here to extract the initially extracted file.
Obviously you will need to have a Redmi 1s that can boot to fastboot mode which we will talk about later and a usb cable and the phone should be charged to atleast 60%.
PROCEDURE
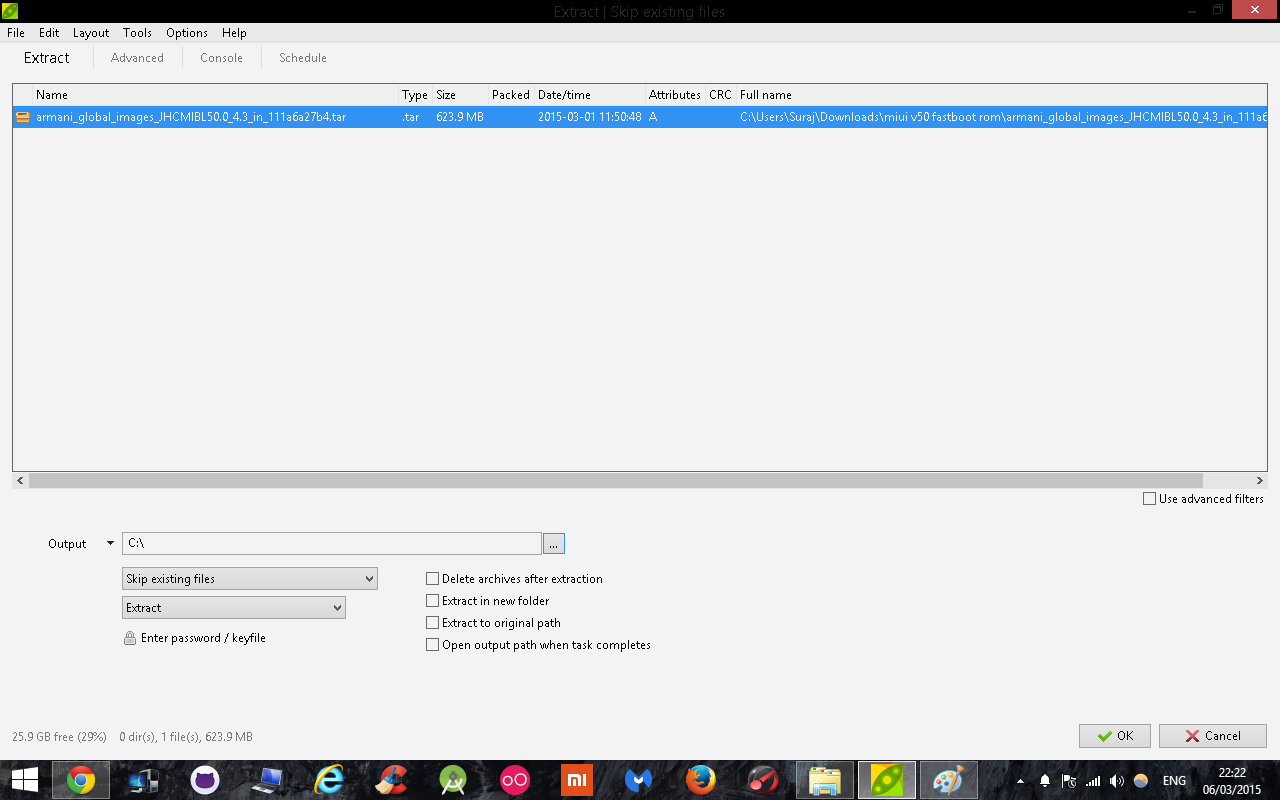
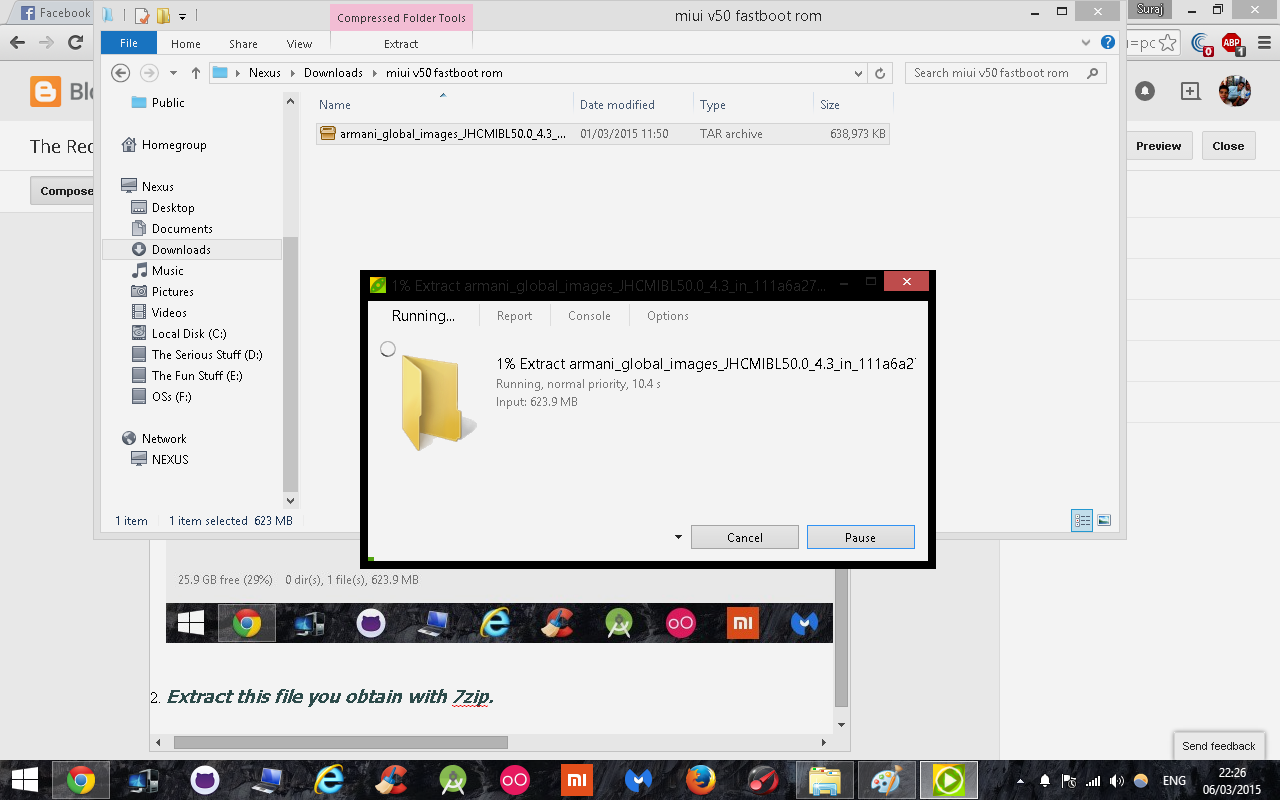
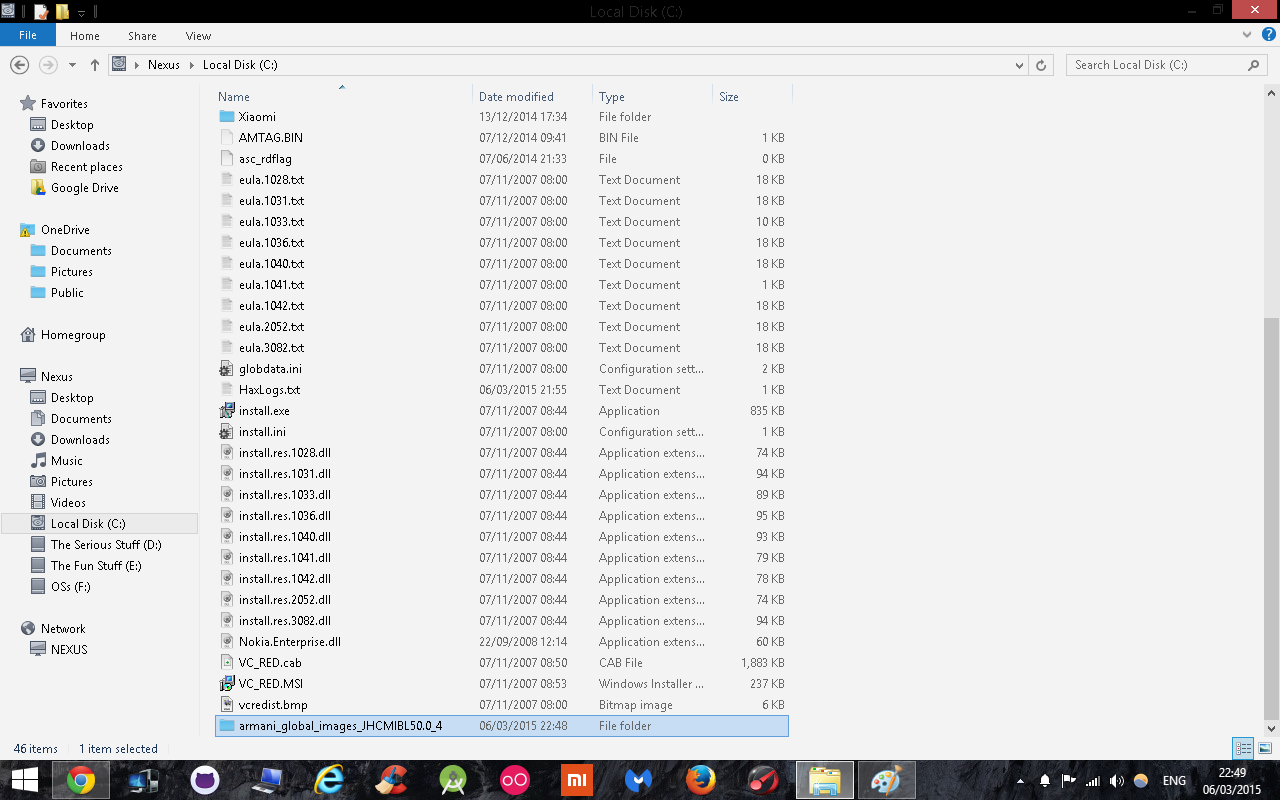
Extract FASTBOOT ROM in "Drive C:" using Peazip
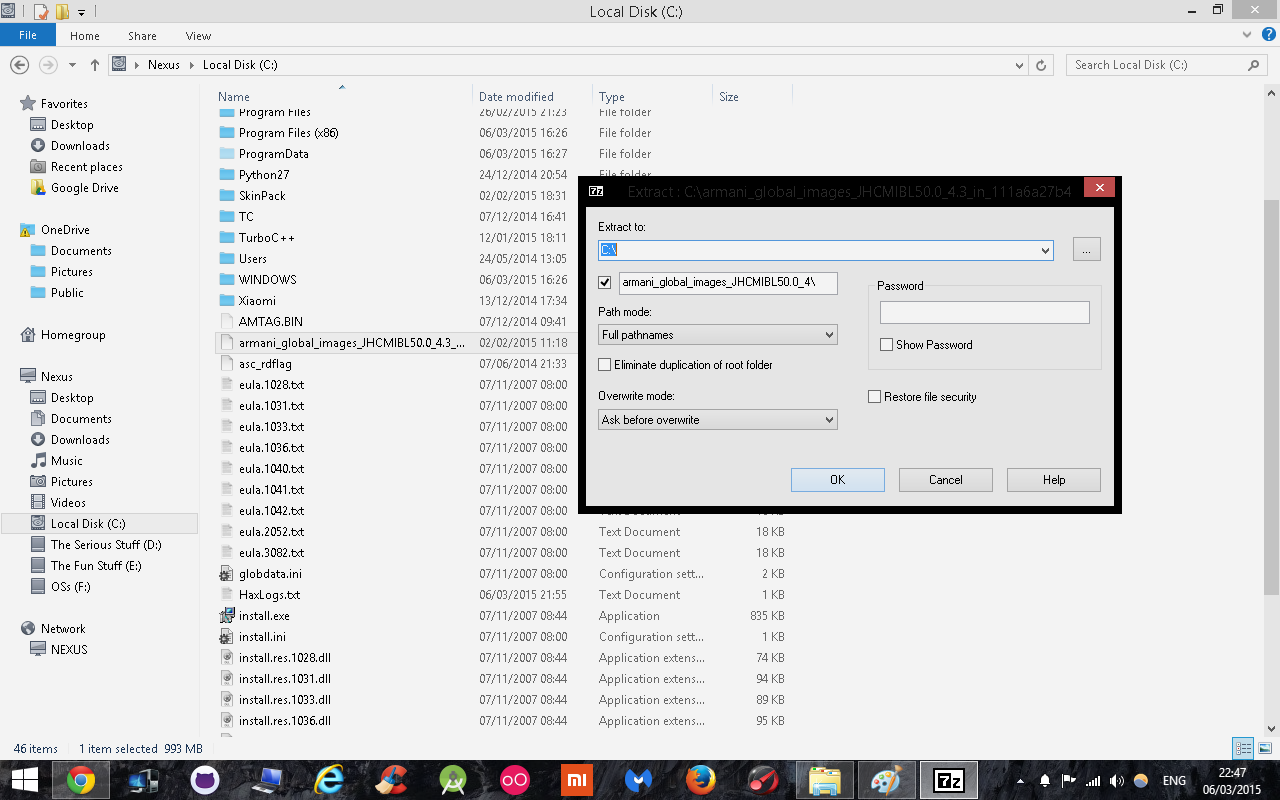
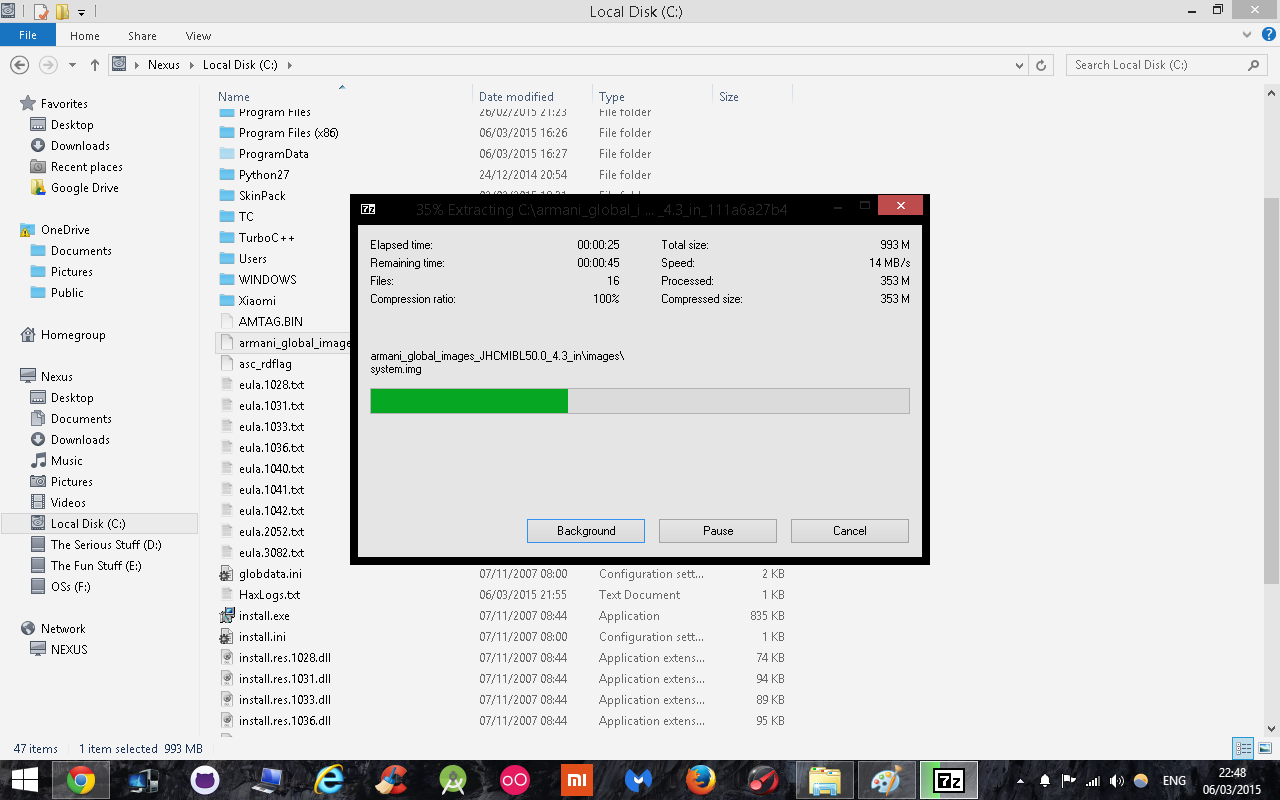
2. Extract this file you obtain with 7zip.
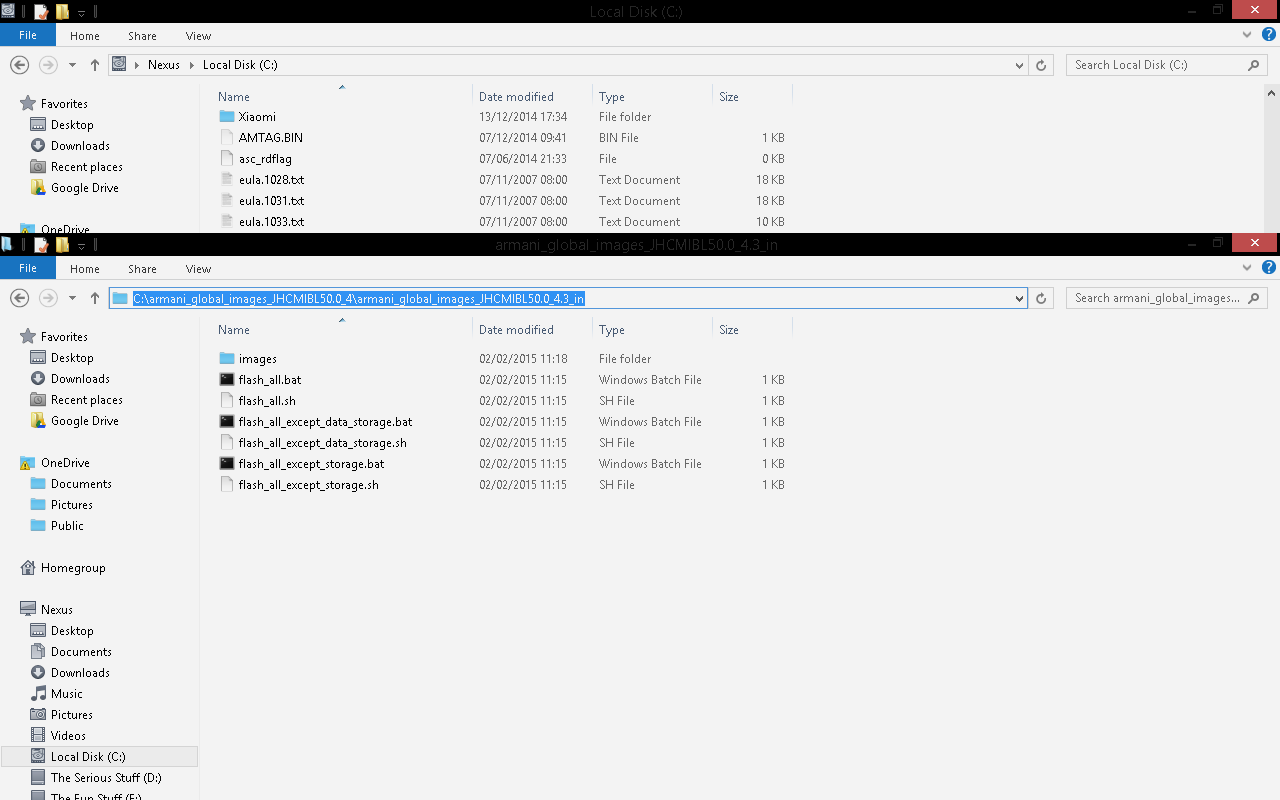
3. Open this folder and the folder inside it and copy this address(ctrl+c)
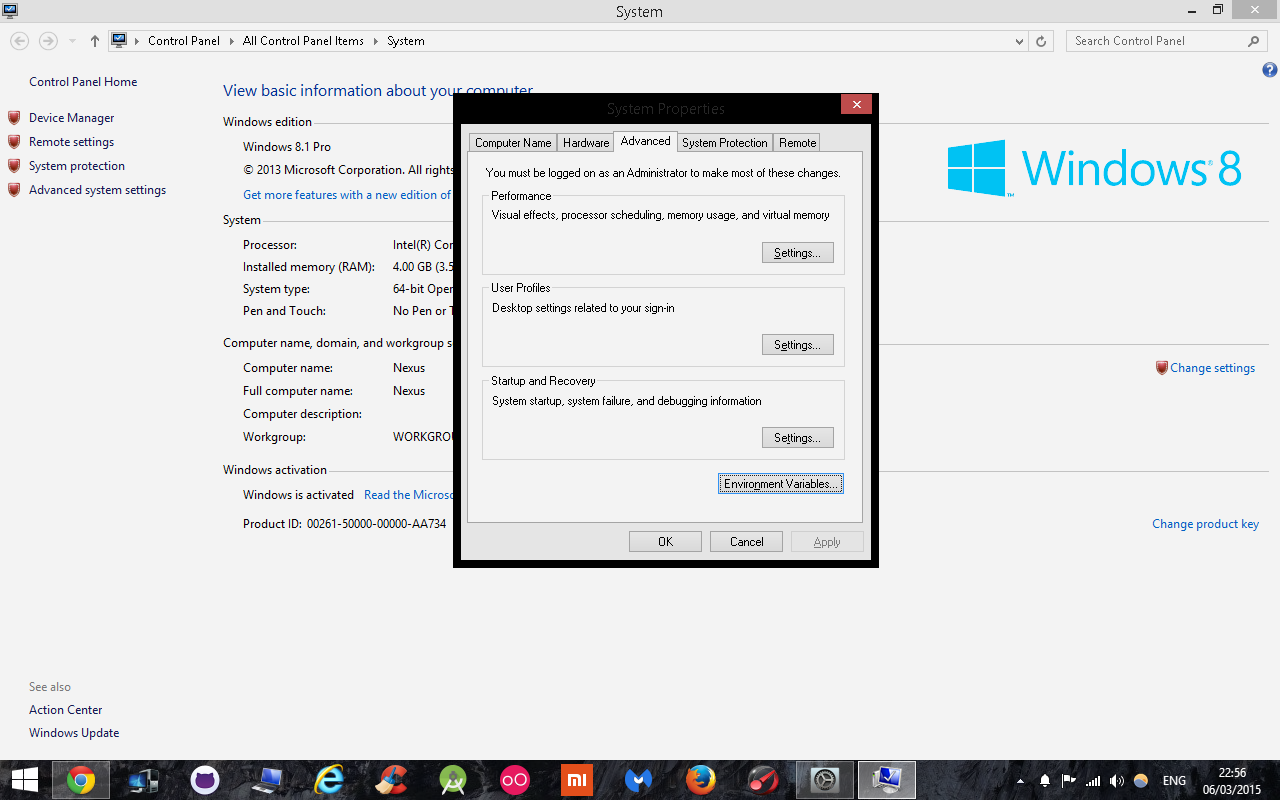
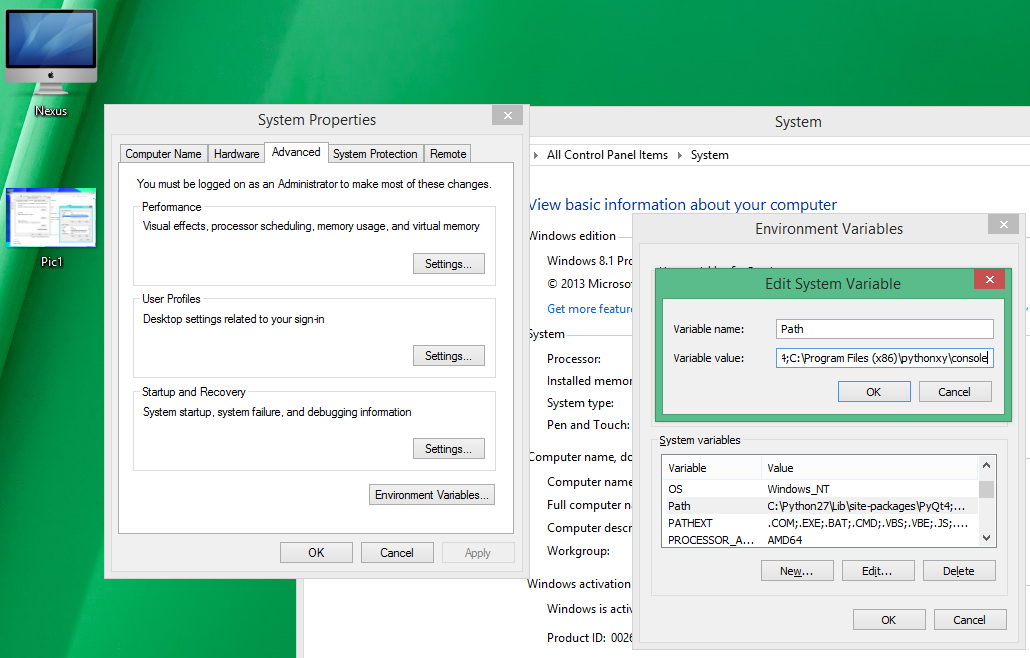
3. Right Click on "Computer" -> Go To Properties -> Then Advanced System Settings
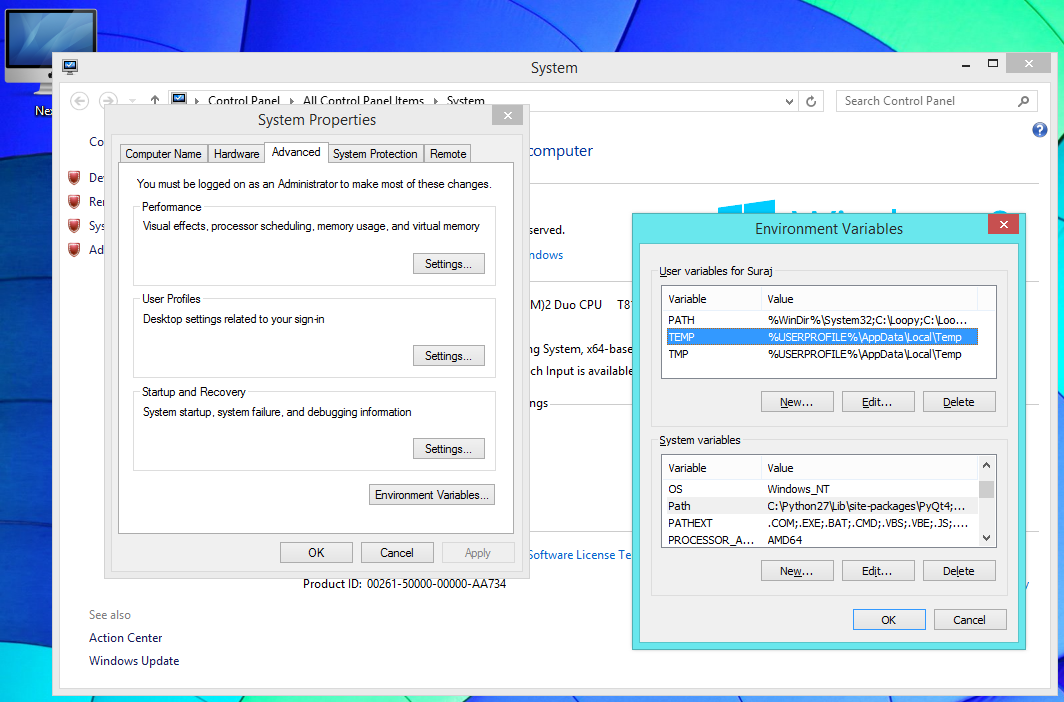
Click on environment variables
click on temp in the user variables section and path in the System variable section and then click on edit
click in the variable value box and to the end of the text , add a ; and then paste the text copied in step 3 here. Click on OK.
4. Close everything and open My Computer > C and navigate to the place where we extracted the fastboot rom. The address will be something like C:armani_global_images_JHCMIBL50.0_4armani_global_images_JHCMIBL50.0_4.3_in
Here there will be 3 .bat files namely
1. Flash_All
2.Flash_all_except_data_stroage
3.Flash_all_except_storage
Boot your phone in fastboot mode by pressing and holding Power button+Volume down button after switching off the phone.
Next double click on one of the three options you saw above
I would recommend you to go with the first option(flash_all.bat)
Wait until the the process completes and the phone will automatically boot after the procedure is complete.
ENJOY YOUR REDMI 1S IN ITS BRAND NEW STATE!!! :D
In case you have any queries or clarifications, feel free to leave comments below. I shall answer them ASAP!!!
First of all you must have unlocked bootloader on your Xperia Phone. To do that please refer to the official guide from Sony on How to unlock bootloader on any Xperia Phone ? It is mandato ry to do that.
Sony Update Service (SUS) then you always flash the original firmware’s ftf file on your phone via Xperia Flash Tool.
Download flashtool-0.9.10.2beta6-windows.exe
Download the “ftf file” of your Xperia device which is must needed in any case.